When it comes to unit test view controllers, people think of using UI Tests instead of Unit Tests. However UI Test is not the answer for everything related to UIKit, and today we will discuss what are the key things to tell you what and when to use each one of them.
What to unit test in view controllers
View controllers form most of our project, therefore unit test viewController is essential and will lead to better code quality.
Just remember you can’t use unit tests for everything related to UIKit, for instance, you shouldn’t use unit tests to test background colors, font size, text color, or even Auto-layout constraints.
On the other hand, we use Unit Test to test if Label text is correct, Button is enabled, IBOutlet exists, and Navigations between ViewControllers
Before we start writing tests first we should load View controllers, and that will get us into three different methods of creating them
and today we will discuss all of them
Now let’s learn how to do the magic.
Setup our Environment
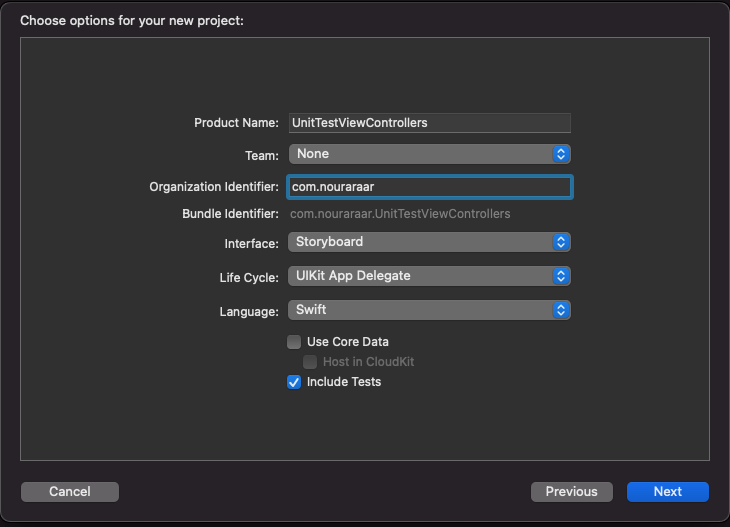
All we need to start by writing unit tests for view controllers is to create a new Xcode project, name it something like UnitTestViewControllers and remember to enable Include Tests.
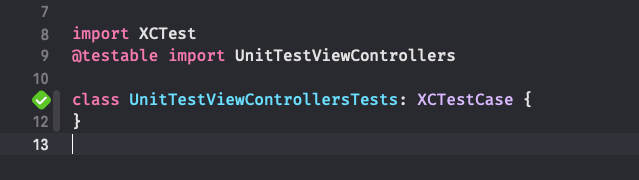
Now go to UnitTestViewControllersTests.swift and remove all the methods inside it, and hit (remember always to select simulator, not a physical device when testing) to run the test and make sure that everything is working, you should get the same result as here
Setup Storyboard based view controllers
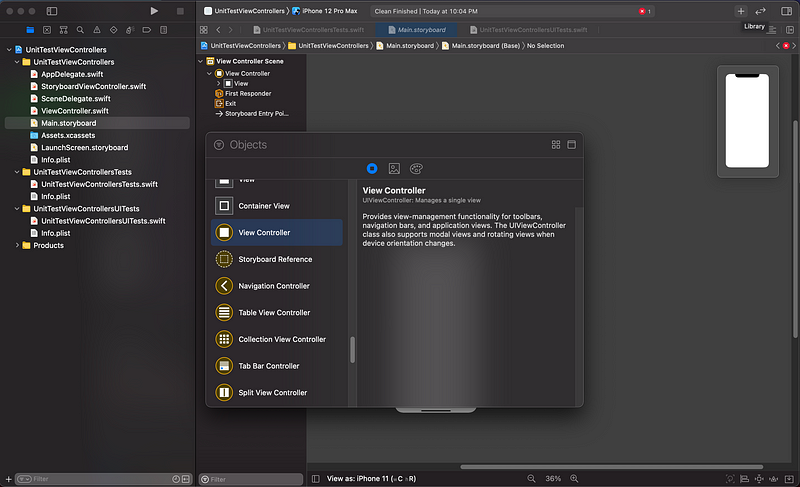
Firstly Let’s start by creating a view controller by going to File->New->File and chose Cocoa Touch Class and then select UIViewController as Subclass and give it the name StoryboardViewController like this

Now For simplicity, we will use Main.storyboard, now go and add the view controller by dragging and dropping it from the library menu
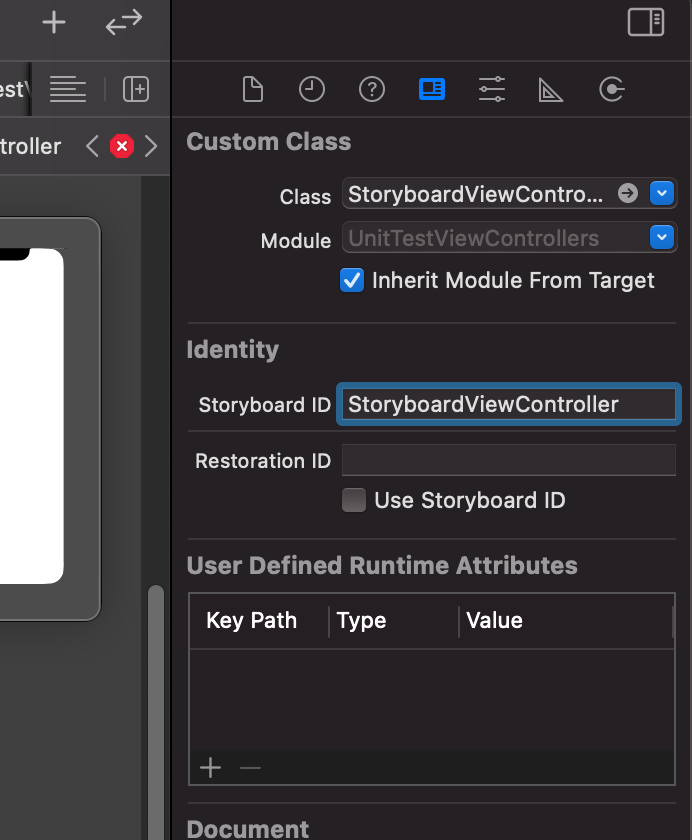
And give it the class of StoryboardViewController and also storyboard ID as StoryboardViewController from the inspectors area
Now add a UILabel to the storyboard and link it to the code

Load Storyboard based view controllers into tests
This should be very straightforward, all you have to do now is go to UnitTestViewControllersTests.swift and write a test case for loading the storyboard view controller and then hit you should get a green mark for this

Now it’s time to test if the Label is loaded, we do that by adding an assertion and then running the test again

As you can see the test has failed because our view controller is not yet loaded we should ask it to load the view first by adding sut.loadViewIfNeeded()before the assertion and that will load the view controller as well as the IBOutlet connection for the label.
Now rerun the test and Voila, tests passed again.

Setup XIB based view controllers
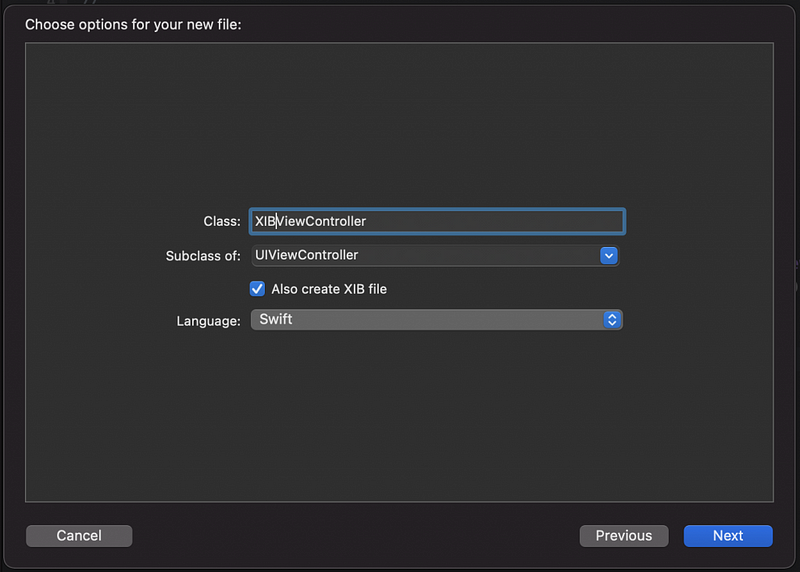
Let’s set up our XIB view controller, well this should be pretty much the same as the storyboard one, go to File->New->File and chose Cocoa Touch Class and then select UIViewController as Subclass but this time check the Also create XIB file and give it the name XIBViewController like this:
Now you should have two files

Testing XIB ViewController
Now after that do the same step as 2.3 Add Outlet and make sure to link it to the code, now go to UnitTestViewControllersTests.swift and add a new method this time to test the XIB view controller

And after running the test you should see the green mark again to know that all has passed.
Setup Code based view controllers
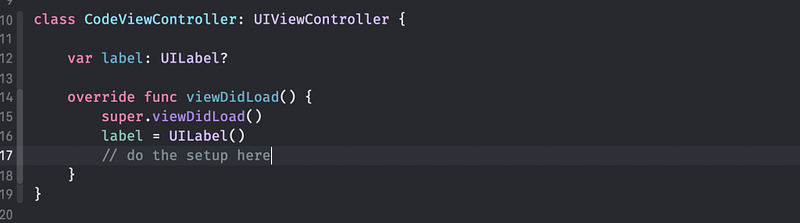
Let’s set up our Code view controller, go to File->New->File and chose Cocoa Touch Class and then select UIViewController as Subclass and give it the name CodeViewController, this is different from the two types before that it doesn’t have an outlet to link, so we need to set up our UI in code, so after creating it open the file and just add the following
Now to test this just go to the Tests file and add the final method

And Hooray now we know how to load and test all the 3 types of ViewControllers.
Conclusion
We have seen today how to set up and load ViewController for testing, later we will talk about testing navigation between ViewControllers as well as how to write testable view controllers so stay tuned.
You can find the code on GitHub.
Before you go…
If you liked this article please clap and share it with friends.
And if you wanted to have a discussion or reach me you can go to my website and get in touch.